Remote imaging accessible to everyone
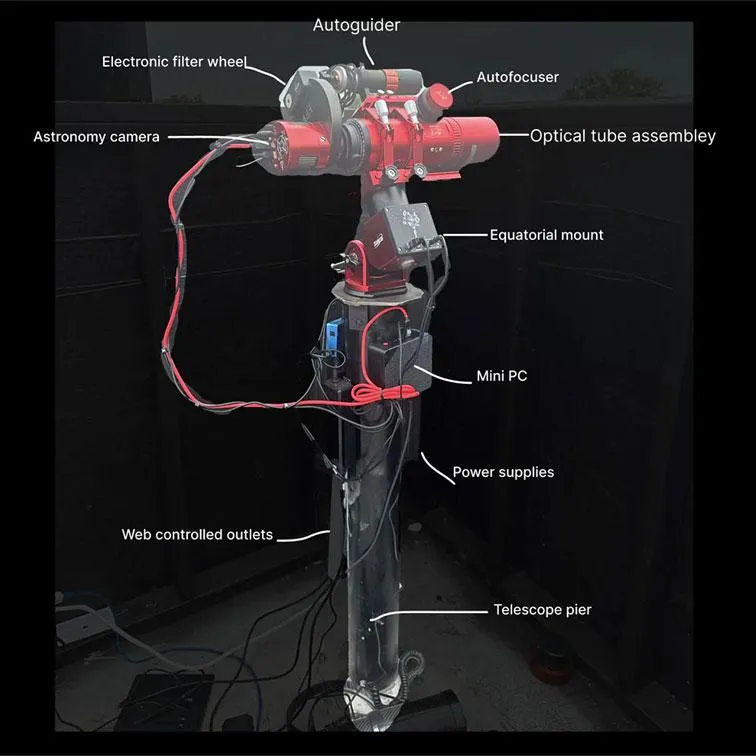
A remote telescope is a lot like your telescope at home, with some small changes: Firstly, consider that a remote telescope is a fully automated system. All of the critical functions of observing are to be done robotically. This means at a basic level you require a computerized telescope mount, an autofocuser, and most likely an autoguider, and a electronic filter wheel. You know your setup is capable of going remote when you can be asleep, and the telescope completes an imaging run by itself. The good news is that many people already have setups like this, often controlled by ASIAIRs.
All that a remote telescoping setup requires beyond this is:
- Control computer (both PC and ASIAIRs are possible! See below for more details)
- Remotely cyclable power outlets (such as a Wifi-capabale Kasa Smart Plug)
By remoting into your control computer, you can do remote astrophotography from anywhere in the world. By using a remote power switch, you can turn on and off your equipment from anywhere as well. This means you can turn on/off, devices, and cycle USB connections by rebooting.

What telescope gear is suitable for remote telescoping?
Almost all common automated telescope setups used today are capable of remote telescoping. If it works in the backyard or in the field automated, there is no reason it will not work out here!
The majority of our customers at Starfront are using short refractor systems, paired with ZWO autofocusers, ZWO/QHY cameras, and AM5/AM3 harmonic mounts.
The one very nice feature to have in remote observing is a mount with a physical home capability. This means after a power out, you can ‘home’ the mount, so it can return to a known location without encoders. If your mount doesn't have a homing ability, we highly suggest you get a pier camera to monitor your mount's position!
If you would have any equipment/setup related questions, don't hesitate to send us an email or send us a message on our contact page!
How do I connect to my PC and control it?
Having operated dozens of remote telescopes around the world, the best software by far is Chrome Remote Desktop. If you intend to use a mini PC at the observatory, simply install Chrome Remote Desktop to your mini PC at home before you ship it out or drop it off. When the computer is connected to power and ethernet, you will have immediate easy access into your remote telescope system.
When you go to actually operate your remote telescope system, we recommend you install NINA to do anything from basic to advanced automated imaging.

How can I use my ASIAIR?
The ASIAIR is certainly possible to use in a remote context, and we have several customers who are successful with using the ASIAIR.
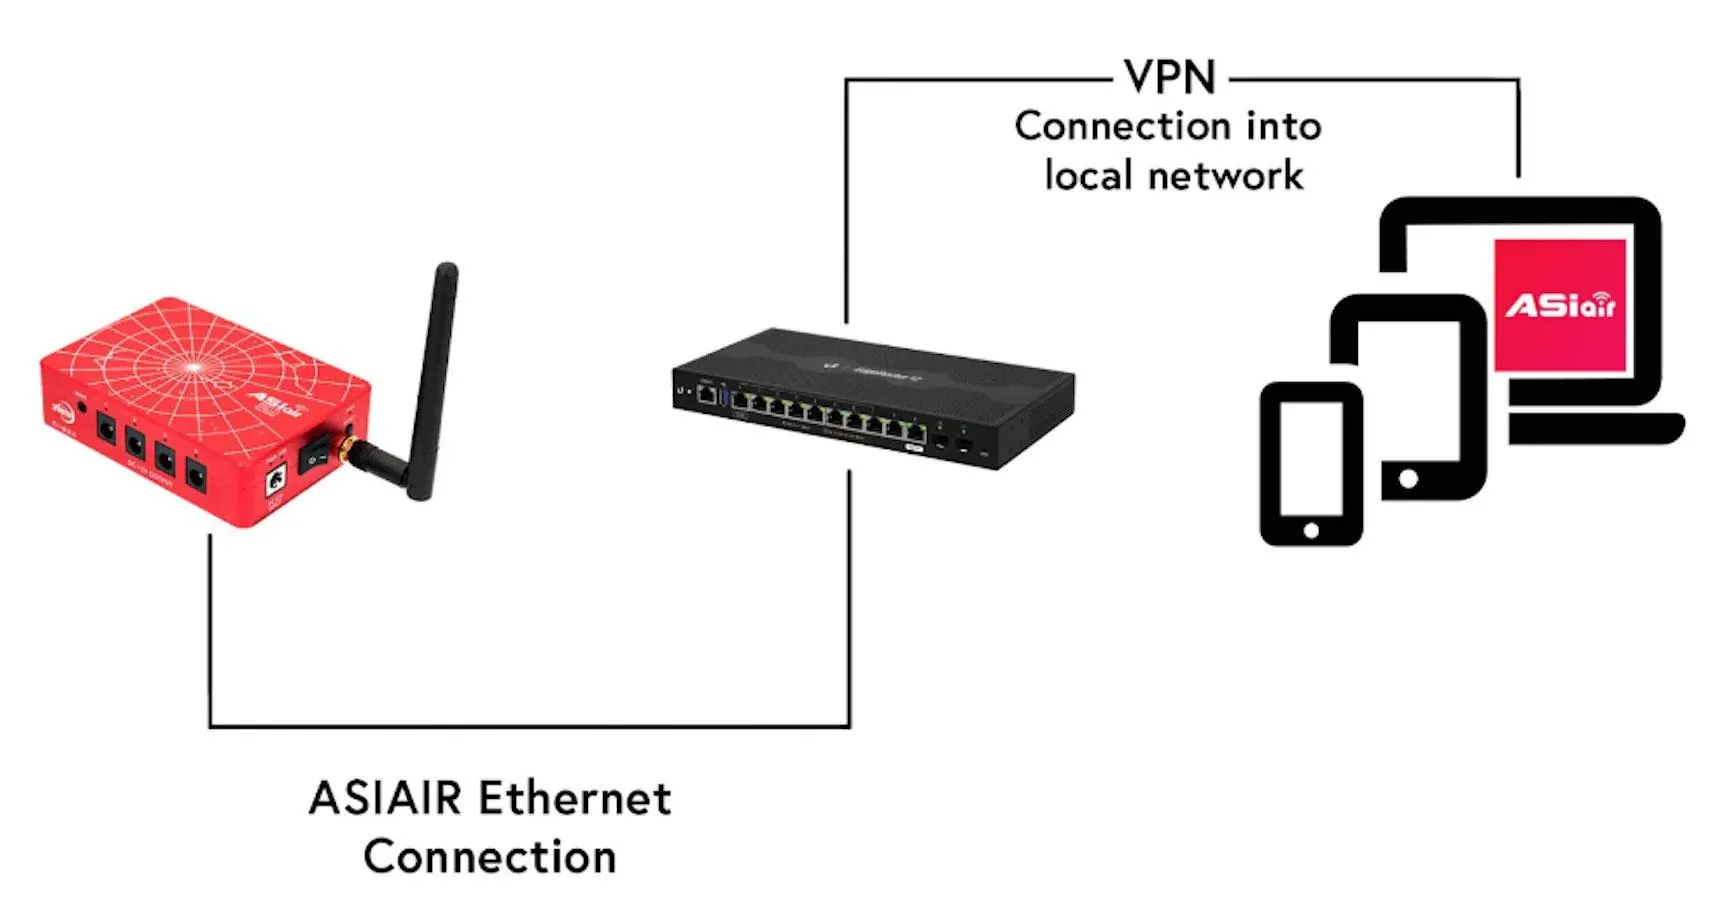
In order to connect to your ASIAIR remotely, we need to use a VPN and a VLAN. This will make it so you can connect remotely to the same network that the ASIAIR is hardwired to via ethernet.
We will give you the necessary config files you need to be able to set up your VPN. Once you have it set up, you can log in to your ASIAIR app remotely just as you would in person!
In order to operate the ASIAIR from some devices like Apple laptops, one must add the ASIAIR IP address as a DNS server in their network settings.
If you are able to connect to the ASIAIR via the app, this means you can also connect to the storage of the ASIAIR, since it is attached to the network. This is done by adding a network drive to your desktop or laptop using your ASIAIR IP address. Login as ‘guest’ and you will have access to your ASIAIR files to transfer them locally to begin editing images with them.
